Saturday, 4 November 2017
Friday, 20 October 2017
Android Voice Controlled Servo Motor Controller : IOT Version using ESP8266
Last week, I created a Voice Controlled Servo Controller using Bluetooth HC-05. This week, I created an IOT version of the Voice Controlled Servo Controller.
Used Strategy Design Pattern (both on Python and C++) to achieve flexibility to switch between the Bluetooth module and ESP8266 module.
Sunday, 15 October 2017
Android Voice Controller Servo Motor Controller using Bluetooth
This is a voice controlled servo motor controller. I created this just for fun. I used the following:
Arduino Mega
Arduino IDE C/C++
Android Speech to Text
Bluetooth to Serial using Serial Port Profile
Bluetooth to Serial using Serial Port Profile
Python SL4A
Servo Motor
Saturday, 7 October 2017
Embedded Linux: Buildroot and BeagleBone
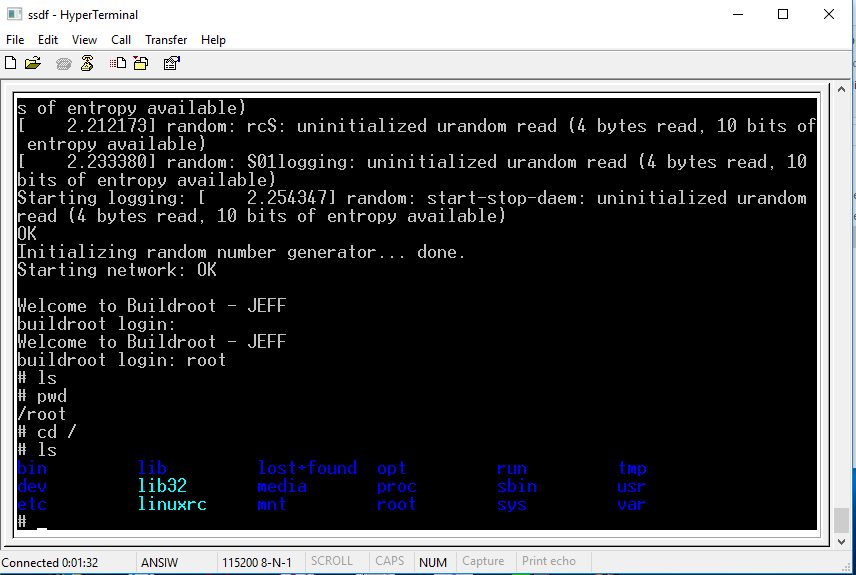 |
| Buildroot for BeagleBone Black - Hyperterminal @ 115200bps |
I posted the whole procedure on my youtube: https://www.youtube.com/watch?v=QLzGKIx9Mz8
I used LUBuntu because it is more lightweight compared to the main Ubuntu distribution.
Monday, 2 October 2017
Test Driving: nRF24L01 + my observations vs CC1101

I am currently trying the nRF24L01 and it is very easy to use. In as little as 30 minutes I was able to make the two modules communicate with each other. I had just started playing with it since yesterday and one thing that I am looking for is an RSSI readout. Unfortunately, this only has a boolean return value for the Received Power (RPD). If received power levels are more than -64dBm, you will get a 1, less than that, you will get 0. In CC1101, I can get the absolute value of the RSSI and convert it to dBm accurately.
I used the steps on this link to setup my nRF24L01.
Sunday, 3 September 2017
Vicks Humidifier Modification: Adding a Humidity Controller with Hysteresis
First, I opened the Vicks Humidifier and checked all the circuit inside and I did my first prototype and sensor characterization on an Arduino Mega 2560.
 |
| Unmodified circuit |
 |
| Arduino Mega Prototype with DHT-11 |
Next,
Next, I modified a couple of things inside the Vicks humidifier. I only have 24V DC on the board and I planned on using an Arduino Mini. I checked Arduino Mini's schematic and it uses MIC5205 regulator. From MIC5205's datasheet, normal operation for Vin is from 2.5V to 16V. Since I don't have any regulator in my hand, I just created a 12V power supply using P2N2222A in emitter follower configuration with voltage divider in it. I used this 12V to power my Arduino Mini.
Next, the float switch needs to connect 24V to certain part of a circuit. I modified this and since I don't like to use a relay in this scenario and I want this be have a lower power consumption, I created a PNP/NPN combo to deliver the needed 24V on a part of Vick's circuit and this triggers the ultrasonic mist generator and the internal fan.
 | |
| Almost Complete |
Now it is working. I implemented a hysteresis from 50% to 60% of humidity.
 | ||
| Arduino Mini Mounted |
 |
Saturday, 26 August 2017
GDB Remote Debugging using LUbuntu Linux and Eclipse CDT Neon 3
I just uploaded a video for GDB debugging using LUbuntu and Eclipse Neon 3.
Saturday, 19 August 2017
1st Time to Join a Hackathon : Lessons Learned
I recently joined a 1-day Hackathon and we were two on the team. There are lots of lessons learned. I will also place comments in italics on how we are doing on every items.
YOU NEED TO KNOW THE SPONSORS AND THEIR NEEDS.
The main sponsor of the Hackathon are doing web apps. And we did a mobile app. All the winners created websites. No mobile apps won on that hackathon. If you would like to win, create a solution AND use a technology that would be inline with their business needs as much as possible.
After that Hackathon, I was too tired. Although it was a good experience. Now, I know what to expect on our next Hackathon.
- Make sure majority of the tools are installed on your PC. Or, at least, the installers should be on your PC. Downloading the installers and installing them will eat some precious time. We are very prepared when we came to the venue.
- The moment the organizers give the Challenge Statement, brainstorm. Refrain from doing any coding. As I have project management background, we were able to come up with a good game plan and a solution to the Problem Statement.
- Make sure you are familiar with Git. You don't have to be an expert in Git. You must at least know how to clone, push, pull, and commit. If you are new to Git, use a UI tool like TortoiseGit.
- Work incrementally. Whenever you have a working code, ALWAYS COMMIT TO GIT! That means having more than 3 commits per hour.
- Take frequent short breaks. As I am the sole developer, I need this because of the stress on the time limit.
- Respect the developer's time. When I was coding and debugging something, my partner keeps on giving suggestions that is not on the context of the problem we are currently solving; therefore, I wasn't able to absorb a thing he is saying since I am focused on doing something.
- Try not to panic when something is wrong. On my case, I did panic at around 3:45PM. I though my software is not working, but when i figured out, the online JSON viewer is showing me the JSON on a wrong way. The data was represented like this: Data1,Info1,Data2,Info2. Due to the constant pressure, I missed that and I thought it was Info1,Data1,Info2,Data2. Try to take note of the details of the datasets in case you are working on Open Data.
- There will be different kinds of people on the venue. Remember the panic that I had on the previous item? When I was dealing with it, some of the people on the other team are celebrating on how good their system was. I panicked crazily. If you are like me, make sure to bring headphones and listen to some MP3 songs. This will help you avoid hearing other people and avoid more panic.
- After you are done, make sure to talk to some other teams and be friendly. If you ask questions on what they did, they will most of the time give you an overview on what they did and you will see how proud they are of their work. You will also learn from them.
- Enjoy the foods!
YOU NEED TO KNOW THE SPONSORS AND THEIR NEEDS.
The main sponsor of the Hackathon are doing web apps. And we did a mobile app. All the winners created websites. No mobile apps won on that hackathon. If you would like to win, create a solution AND use a technology that would be inline with their business needs as much as possible.
After that Hackathon, I was too tired. Although it was a good experience. Now, I know what to expect on our next Hackathon.
Sunday, 25 June 2017
Review Comparison: Keweisi and USB Charger Doctor
I am currently evaluating two USB voltage/current tester : Keweisi and USB Charger Doctor.


Here is the data from the picture above:
My trusty Digital Multimeter - 8.87V
Keweisi: 8.99V/1.53A
USB Charger Doctor: 7.49V/1.50A
As some of you will wonder, why the voltage reaches more than 5V? This is because of Samsung's Fast Adaptive Charger, and it can go up to more than 5V. There are good explanations here: Link
Here, the charger switches up to to near 9V. Both the current on two USB voltage/current measurement device are almost identical so let's assume they are both ok. BUT, the voltage are different. It seems to me that the upper limit for the USB charger doctor is only up to 7.5V.
Conclusion:
Keweisi is the clear winner here. It can display the voltage and current at the same time and it can measure more voltage than the USB Charger Doctor.
Saturday, 10 June 2017
Instantiator Based Programming Paradigm (C++)
Recently, I had an issue putting the uWebsockets data type on my
project's headers. There were so many compiler errors by just including the datatypes
of uWebsockets to my project's header file. Placing both the class
declaration and definition inside the cpp source code file resolved the
issue. But the next question is how will I instantiate the uWebsockets
outside, this is where the instantiator came in.
I discovered by accident, and I like this new paradigm of programming. This way, everyone will be forced to do a very important principle: “Program to Interface, not to an Implementation.” And I don't need to switch to header and source everytime. I can just use the IDE's split window capability to easily edit the declaration and definition. I know this will challenge the norm because we normally separate the declaration and definition to the header and source code file. But I am ready to take criticisms and I will adjust if necessary. But as of this writing, I don't see any disadvantage and instead I only see advantages.
To illustrate here is a very simple source code on how I did it:
Websocket.cpp – Both the class declaration and definition are located here. At the end, you will see the instantiator. It will return an abstract base class pointer.
Websocket.h - This will contain only the instantiator functions.
AbaseWebSocket.h - This the abstract base class that websocket class will inherit.
main.cpp - Demonstration of how to use it.
The instantiator can produce new instances or it could produce a static instance (aka Singleton).
Again, this way, everyone will be forced to do a very important principle: “Program to Interface, not to an Implementation.” Because there is no way for you to be able to instantiate a concrete class because they will all be inside the cpp file, thus you need to go to the necessary abstractions.
Source Code Link
Saturday, 27 May 2017
Getting Started: Altera Quartus / Python MyHDL / MAX-II CPLD / USB Blaster
Here is a short video on how to use Python MyHDL with Altera Quartus
https://www.youtube.com/watch?v=nj61a2VXG-w
https://www.youtube.com/watch?v=nj61a2VXG-w
Sunday, 7 May 2017
Animated Hello World : IronPython with XAML/WPF/Blend 2015 /.NET
I created a small tutorial on how to do an animated hello world in IronPython.
Link
Check my Youtube channel as I update it more often than this blog.
Link
Check my Youtube channel as I update it more often than this blog.
Saturday, 4 February 2017
Why Git?
On this post, I would like to highlight
the advantages of using Git based on my personal experience. I am
currently using TortoiseGit and it helped me increased my productivity. I had used different Version Control Systems (CVS, SVN, TFS,
VSS) and I think Git is far more superior than them.
----------------------------------------------------------------------------
Scenario: When I started my
career, the way I version control my project is by
duplicating/copying the current folder and appending some info onto
it. Sometimes, I will zip it. And like for example my project folder
name is: MyProject , then I will copy it and rename it to
MyProject - Dec 25, 2003 Version 00.08.00 Beta – Added unit
test.
I even took it one step further, I
created a Python script to automate the archiving and ignore all the
files the doesn't need to be stored (like all files and
sub-directories on bin\ and obj\).
Problem: Most
of the times, you need to see the difference of the original and
modified file. It will be very difficult to diff and compare
the project files using the scenario above. How git resolves it?
With git log, it is easy to compare the files and you can do a
personal code review before doing a commit and this is a very big
plus. I can also easily see if I accidentally deleted or
unintentionally modified some of the codes. Plus, every log has some
comments.
Problem: Using the primitive way
of copying project folders manually, you will also be copying all the
unnecessary things like executables and object files which you
can always generate and this may also increase the size of your
archieves. How git resolves it? Just create one text file
(.gitignore) and it will ignore all the files to be committed.
Problem: People thinks that
archiving the project into zip files will yield smaller backups. How
git resolves it? That thinking
is wrong. I had an old project where I archived it using zip files. I
manually ported them to TortoiseGit (and I admit, it was tedious to
re-commit that project and I should have used Git in the first
place). After finishing, I went to Git Bash and run git gc.
Bam! My total git repository size was far way smaller than all the
zip files combined!
Conclusion on this Scenario:
I personally feel
that the copying of files and/or manually archiving it into zip files
is not a good way of doing things. Although that Python script worked
perfectly, I think that it was a waste of time.
----------------------------------------------------------------------------
Scenario: Before,
the way I reuse source code modules is by copy pasting the source
codes into project folder.
Problem: Maintenance
problems. Updating all the copies will be very difficult. If you
modify that common code and you would like all the projects to use
it, then you need to copy paste the updated files. Plus, you don't
have any trace-abilities. How git resolves it? Git
submodules! This is one of the best features of Git that I love. I
have 3 projects and they share one library which is still evolving
and being updated constantly. This one shared library is a submodule
of the 3 projects and they refer to a single Git repo. Whenever there
are new updates, I just do a Git submodule update.
----------------------------------------------------------------------------
I really love Git and I hope I learned it a few years back. I can easily do trial and error on my codes, and if don't like the outcome, I could easily revert it using Git. I can also put my current progress on-hold without committing (using Stash) and go to different branches. I almost use it in everything (e.g. Password manager, resume/CV [I use the diff in MS Word], version control during picture editing). The logging mechanism of any VCS is important and I hope people will start using Git (or any VCS) instead of copying and/or zipping project folders.
Subscribe to:
Comments (Atom)