- Download the image from https://beagleboard.org/latest-images
- Extract using 7-zip and you should be able to have a file with .img extension.
- Write using Win32DiskImager.
- As of this writing, there are additional step that needs to be done to enable the eMMC flasher on the image. You need to modify the uEnv.txt
- If you have Windows machine, use VirtualBox and load your favorite Linux distro (LUbuntu on my case)
- Follow these steps extracted from Beagleboard.org: To turn these images into eMMC flasher images, edit the /boot/uEnv.txt file on the Linux partition on the microSD card and remove the '#' on the line with 'cmdline=init=/opt/scripts/tools/eMMC/init-eMMC-flasher-v3.sh'. Enabling this will cause booting the microSD card to flash the eMMC. Images are no longer provided here for this to avoid people accidentally overwriting their eMMC flash.
- Make sure that your BBB is turned off.
- Plug in the SD card.
- Press and Hold S2 button. (Don't let go!)
- Plug in the power.
- Wait for the User LED to flash then about 4 to 5 seconds, release S2 button
- Wait for around 10 to 20 seconds for the User LEDs to do "running LED lights". This is the signal that BBB is flashing.
- Wait for user LEDs to turn off, this is the signal that BBB is finished flashing.
- It will turn off at the end.
- Remove power
- Remove SD card.
- Reapply power.
- Enjoy
Friday, 11 May 2018
Flashing/Upgrading the eMMC of Beaglebone Black (2018)
I am looking for instructions on how to upgrade my BeagleBone Black. Most of the instructions on the web are outdated and doesn't work. Here are the steps I did to upgrade my BBB:
Monday, 30 April 2018
Embedded C++ for MSP430 using IAR compiler
In my current project, I used Embedded C++ for MSP430 using IAR compiler. I re-created an existing assembly project and I was able to reduce the code size from 30KB down to 15KB. Yet, I have more features in my new Embedded C++ firmware. I am very careful with the C++ features that I used due to limited resources (processing power, RAM, FLASH size), the most expensive thing that I used is the virtual method which I essentially needed to implement strategy and template method design patterns. I also used the Instantiator Based Programming Paradigm to eliminate unneeded build times (similar to C++ PIMPL) and to be able to adhere to a good programming principle: "Program to Interface, Not to implementation."
At the end of the project, the code size is small, the code is very expressive, code is unit-testable and the software architecture is very flexible due to application of object-oriented design patterns.
I am very impressed with the IAR C++ compiler.
At the end of the project, the code size is small, the code is very expressive, code is unit-testable and the software architecture is very flexible due to application of object-oriented design patterns.
I am very impressed with the IAR C++ compiler.
Saturday, 31 March 2018
Unit Testing Simple Linux Kernel Module
This morning, I am trying to learn Linux Kernel development from https://blog.sourcerer.io/writing-a-simple-linux-kernel-module-d9dc3762c234 Link .
The examples are very good. However, I am looking for a way to do unit testing and I can't find any info on how to do this. I am a unit test advocate and I fully support unit testing. Why? Because system testing is expensive and from my experience, time-consuming.
I would like to unit test on Eclipse so that I could use Eclipse CDT and GDB's full power in terms of debugging.
With just a few #defines and #ifdefs, I was able to come up with a way to do simple unit tests using asserts. Nothing impressive actually, however the quick feedback of unit tests will be very helpful in getting good code coverage of testing.
I placed the source code demonstration here: Link
For now this will work, however I will be improving this and will be adding a proper unit testing framework.
The examples are very good. However, I am looking for a way to do unit testing and I can't find any info on how to do this. I am a unit test advocate and I fully support unit testing. Why? Because system testing is expensive and from my experience, time-consuming.
I would like to unit test on Eclipse so that I could use Eclipse CDT and GDB's full power in terms of debugging.
 |
| Eclipse Oxygen.3 CDT Release (4.7.3) |
I placed the source code demonstration here: Link
For now this will work, however I will be improving this and will be adding a proper unit testing framework.
Thursday, 29 March 2018
My Less than $4 Faucet Temperature Monitor
This weekend, I was able to finish my temperature monitor.
I just bought the following materials:
- Temperature display with thermocouple from Ebay ($1.50)
- Crayon box from Walmart ($1)
- Electrical tape
I used my Dremel tool to fit the crayon box into my faucet. All in all, I just spent less than $4.
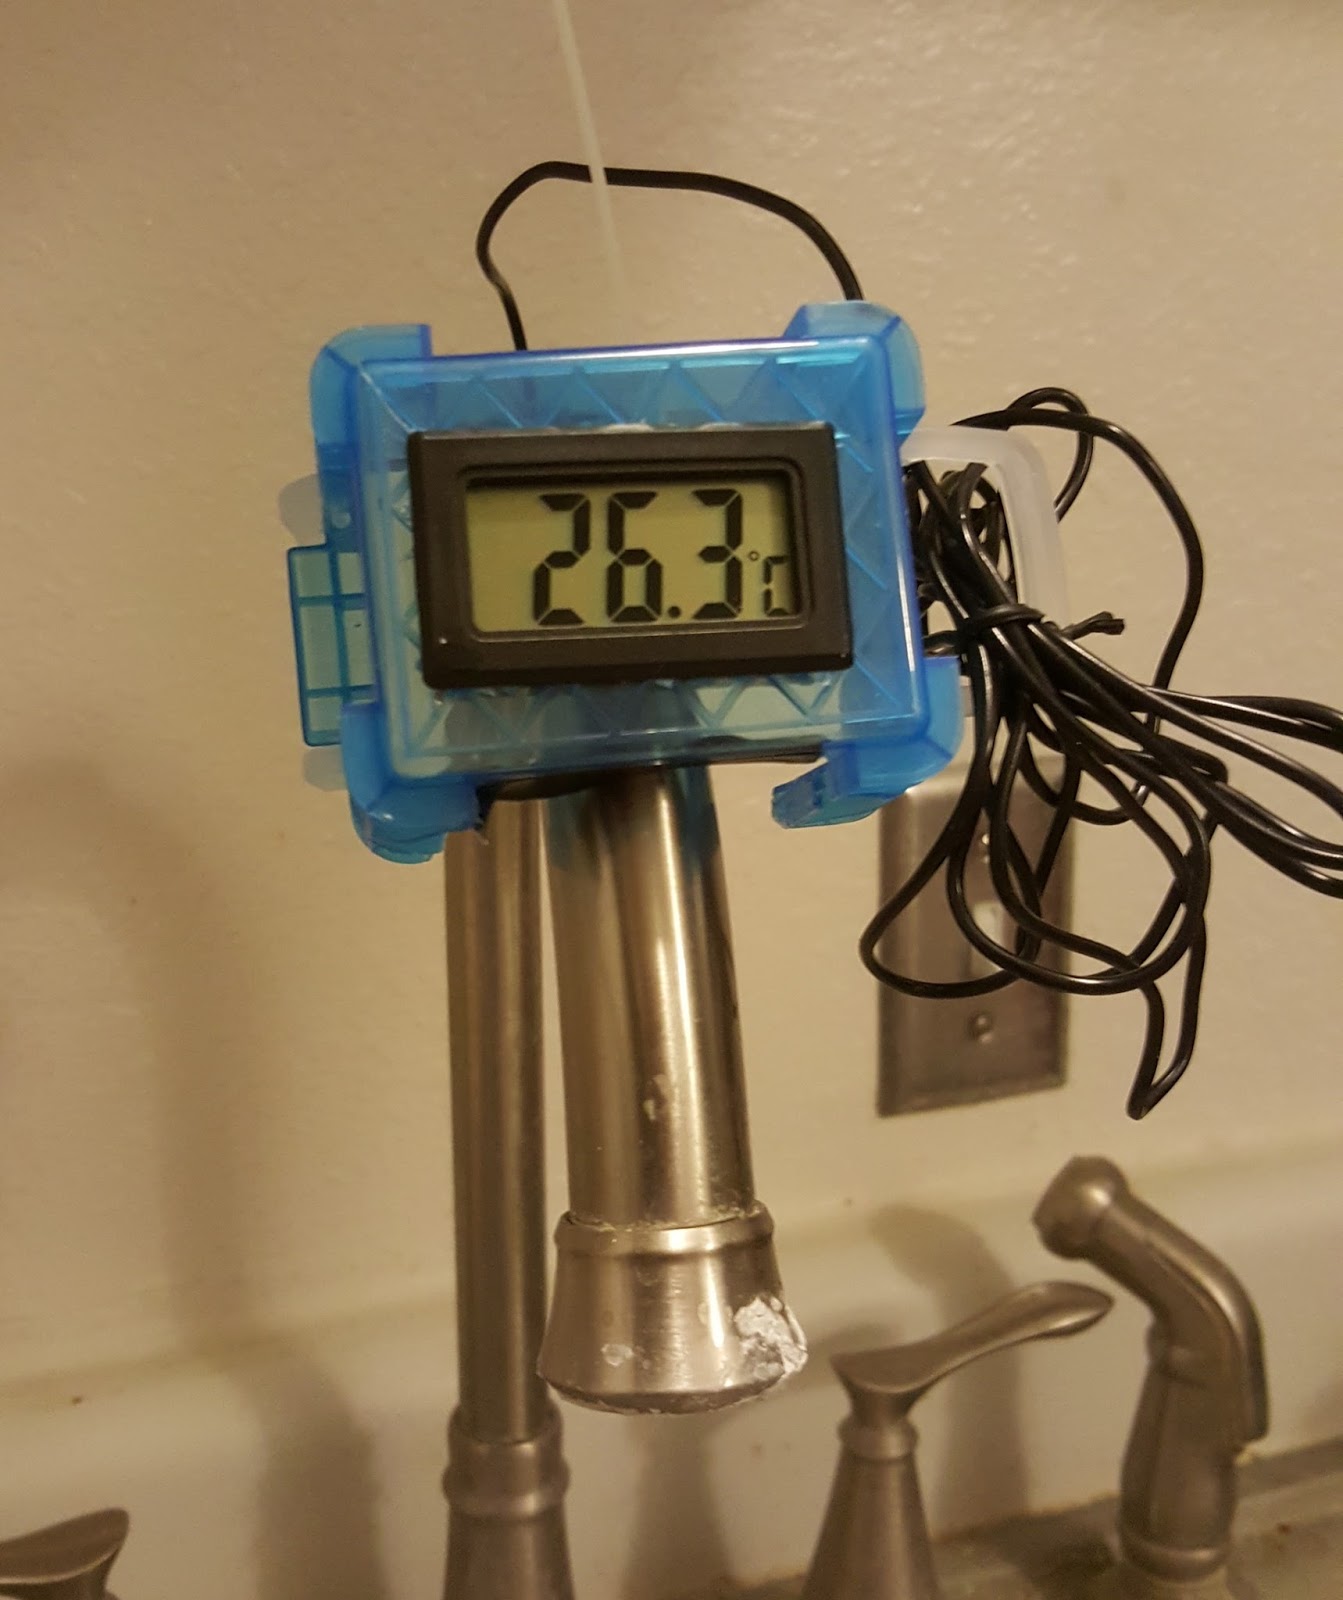 |
| Faucet temperature monitor (I still need to tidy up the wiring LOL) |
I just bought the following materials:
- Temperature display with thermocouple from Ebay ($1.50)
- Crayon box from Walmart ($1)
- Electrical tape
I used my Dremel tool to fit the crayon box into my faucet. All in all, I just spent less than $4.
Saturday, 24 March 2018
Easy Arduino unit testing using Emulare and ArduinoUnit
I just uploaded a video on youtube on How to do Unit Testing on Arduino using Emulare and AndroidUnit. This is purely a simulator unit testing and doesn't require a board, which is great for unit testing.
Saturday, 3 March 2018
Writing NFC app using Cordova for M24LR16 I2C RFID EEPROM - but...
I am in the process of creating an Android app using Cordova with phonegap-NFC plugin. I am interfacing with an RFID I2C EEPROM M24LR16 and my firmware is already ready and tested. I have the sample Android app of ST Microelectronics and the RFID EEPROM works and I can transfer and read data. But after building the Cordova app for 1 hour, it didn't work.
Digging into the documentation, phonegap-nfc doesn't support non-NDEF tags. Most folks are suggesting to modify the phonegap-NFC library for that purpose. It is my first time to work with NFC tag firmware and this is a very good learning experience. I don't know which path to go as of the moment, but I will try to modify the phonegap-NFC library. If it doesn't work out, I will develop the Android app using Android Studio.
Update:
I had just finished creating the Android app using Java (Android Studio). It works great with Non-NDEF NFC tags. :)
Sunday, 25 February 2018
LORA: RF SX1278 Review
This weekend, I did a prototype project using LORA SX1278 for a 433MHz project. A friend of mine sent me two XL1278 module.

When I received the modules, I was so excited to test it. I have experience with TI CC1101/CC430 and NRF905 and I would like to do a comparison in terms of development time.
Upon reading the datasheet, everything is very straightforward. With the SX1278 datasheet's help, I was able to develop my C++ SX1278 driver and make it work with TI MSP430 FRAM microcontroller. Unlike, TI CC1101/CC430, I don't need any tool like SmartRF studio to get all the settings. I can just do a register computation for the frequency. Everything is straightforward with this LORA chip.
Since I don't have a spectrum analyzer, I used my $9 USB RTL-SDR (Software Defined Radio) to capture signals in the air.

 |
| Spektrum Interface (not an actual picture from my experiment) |
Continuing with my experiment, when there is no one transmitting, RSSI levels are at -137dBm. I tried transmitting something (I used Spreading Factor of 7 and I am transmitting 128 packets in one shot) and the receiver got a 128byte packet at -19dBm. That is pretty impressive. I haven't done my Friis equation transmission equation analysis yet but looking at this data, I believe we can achieve very far range with this one.
This is a very good module. However, I may need to try some other antenna and I may need to design a quarter wave monopole antenna by hand before doing our range test.
-Jeff
(I don't own any of the picture, please see the link)
Image from: https://www.ebay.com/itm/433-LoRa-SX1278-Long-Range-RF-Wireless-Transceivr-Module-SX1276-5Km-For-Arduino-/322929644930
https://www.rtl-sdr.com/spektrum-new-rtl-sdr-spectrum-analyzer-software/
Subscribe to:
Comments (Atom)